Mastering Large-Scale Product Photography
Photographing large products in a production environment presents unique challenges that require a blend of technical expertise, meticulous planning, and creative problem-solving. Whether you’re working with massive machinery or other sizable industrial products, achieving a high-quality, detailed image requires careful attention to every stage of the process. Drawing on over 45 years of experience in this field, this article will guide you through the essential steps to successfully photograph large-scale products, from initial planning to post-production.
Planning: Setting the Foundation
Understanding Client Requirements
The foundation of any successful large-scale product photography project is understanding the client’s expectations. This step is critical; a clear understanding of what the client needs will guide all subsequent decisions. In this particular case, the client required both a high-resolution photograph and a video of a sizable machine. However, this article will focus on the photographic aspect, while also touching on a few considerations for video work.
Conducting a Site Visit
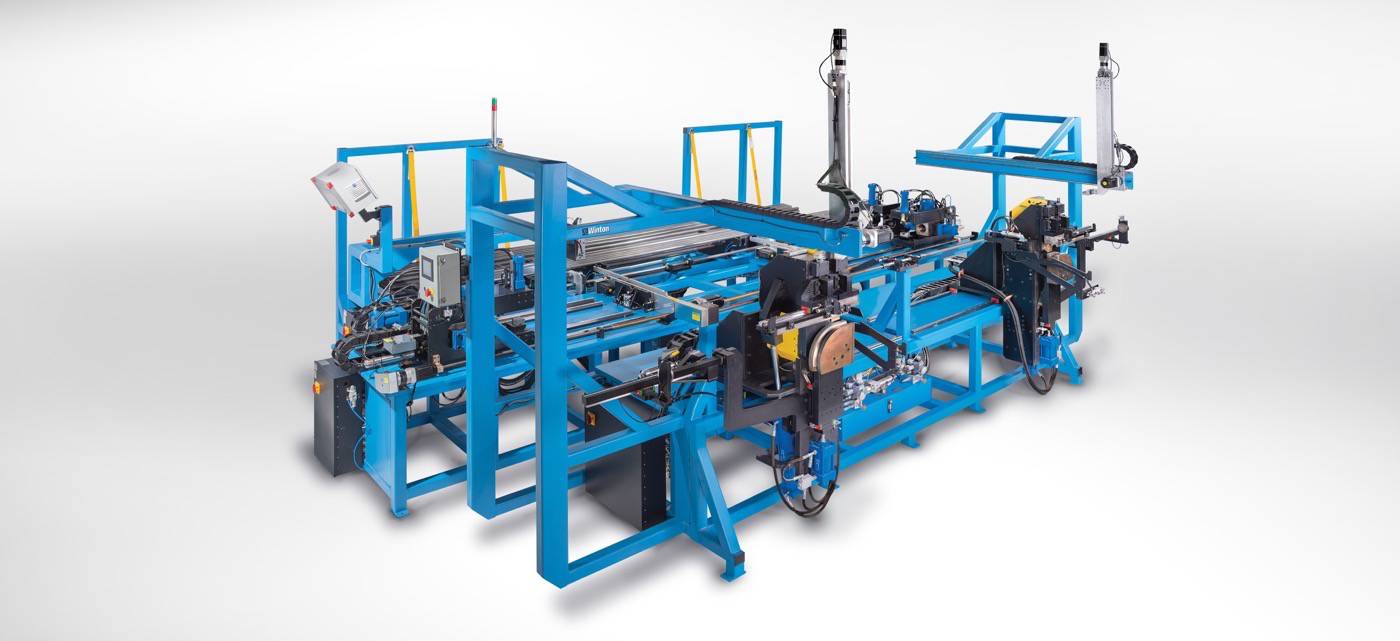
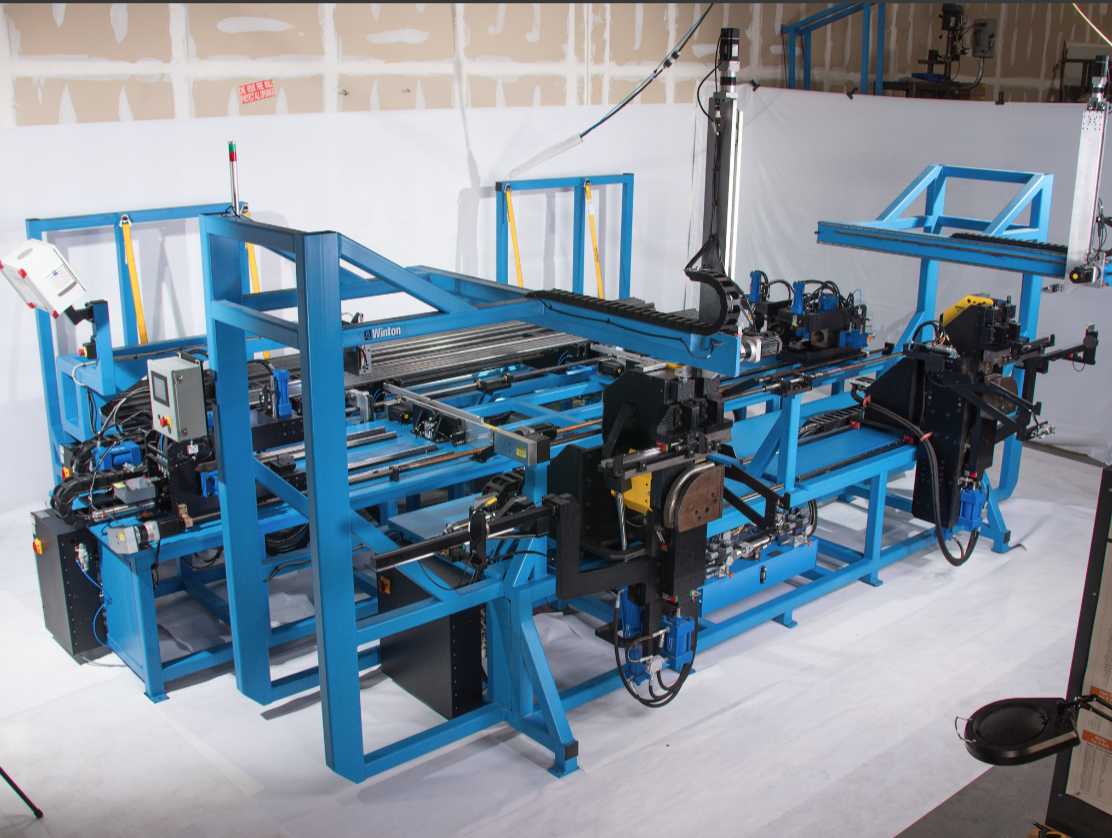
A site visit is essential to assess the space, lighting conditions, and any potential obstacles that might affect the shoot. For this project, the machine was approximately 20 feet wide, 18 feet deep, and 15 feet tall. The client wanted the final photograph to be printed at actual size, which required producing an image around three gigabytes in size with a resolution of 95 to 120 DPI.
 During the site visit, it became evident that the machine’s surroundings would need significant preparation to achieve the desired outcome. We determined that covering the back wall and floor with white vinyl would be necessary to enhance lighting and simplify post-production. Additionally, we decided to use a white muslin background for contrast and light bounce, which would be crucial during the editing process.
Setup: Preparing the Environment
Preparing the Floor and Background
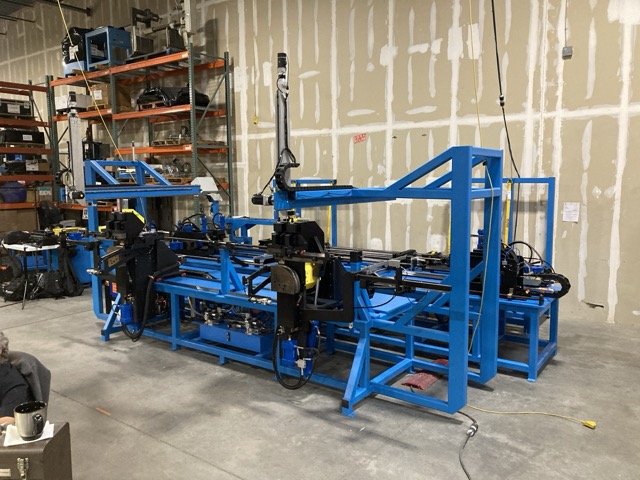
Working in a production environment often means dealing with suboptimal conditions, such as poor lighting and cluttered floors. To address these issues, we began by sweeping the area around the machine and laying down heavy-duty vinyl flooring. The vinyl, which can be sourced from sign suppliers, provides a clean, reflective surface that enhances both the photograph and video quality.
We also set up C-stands, power cables, softboxes, and cameras, ensuring everything was securely positioned to prevent any disruptions during the shoot. White muslin backdrop material was stretched on banner stands to create temporary walls, giving us greater control over the background and lighting.
Lighting Considerations
For large-scale product photography, lighting is paramount. In this instance, we began by setting up continuous lighting to provide a consistent base. If necessary, flash lighting was added later to highlight specific details. A combination of continuous and flash lighting often yields the best results, especially when dealing with complex machinery.
Due to the size of the machine, the client provided an 8-foot platform, allowing us to position the main camera at an optimal height. After setting up the camera, we took a test shot and consulted with the client to make any necessary adjustments to the lighting and background.
Final Preparations
Before commencing the shoot, we took one final step: wiping down the machine with WD-40. This not only removed fingerprints and dirt but also added a subtle shine to the metal surfaces, reducing the need for extensive post-production work.
Shooting: Capturing the Image
Executing the Shoot
With everything in place, we began the shooting process. For this project, video footage was captured first, with multiple cameras recording the machine from different angles. Once sufficient video material was collected, we removed the extra cameras and focused on the primary photograph.
Given the size of the machine, capturing a single image without distortion was impossible. To overcome this, we started by setting the exposure for the continuous lights and then used flash lighting to fill in specific areas. A series of bracketed exposures were taken of the entire machine, followed by close-up shots to capture intricate details.
This method ensured that the final image would have the highest possible resolution and detail. Typically, such a process yields between 30 and 130 photographs, which are later combined in post-production to create the final image.
Post-Production: Refining the Image
Organizing and Editing
Post-production is where the final image truly comes to life. We began by reviewing all the images in Adobe Bridge, selecting the best wide-angle shot of the full machine and the most detailed close-ups. These images were then opened in Adobe Camera Raw for initial color adjustments.
 After adjusting the colors, the full machine shot was opened in Photoshop, and the final image resolution was set. For large-scale prints, a resolution of 400-500 pixels per inch is typically ideal.
Blending and Finalizing the Image
With the resolution set, we began layering the close-up images onto the master shot. By changing the blend mode to “difference,” we could precisely align and distort each detail shot to fit the master image. Once all layers were aligned and blended, the background was meticulously masked out to ensure a clean, sharp final image.
Adding Shadows and Finishing Touches
To add depth and realism to the image, multiple layers of shadows were created using 30% black in CMYK mode. Each shadow layer was adjusted to achieve a natural look, closely matching the lighting and shadows in the reference photos. Once satisfied, the shadow layers were merged, and final color corrections were made.
The result was a high-resolution, detailed photograph that met the client’s exact specifications, ready for both print and digital use.
Conclusion
Photographing large-scale products in industrial settings is a complex process that requires careful planning, precise execution, and skilled post-production. By following these steps, you can overcome the challenges of working in a production environment and deliver high-quality, detailed images that exceed client expectations. Whether you’re photographing massive machinery or other large products, these techniques will help you achieve professional results every time.